I put these steps together using information and videos from this site http://blogs.technet.com/b/xdot509/.
-
On the 2008 CA, create the following directory structure:
a. C:\CABackupDatabase
b. C:\CABackupConfig -
Open the Certification Authority snap-in, right click on the CA name, and select Properties.
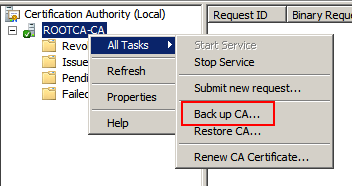
-
Click Next when the wizard launches.
-
At the next screen, check the boxes next to Private key and CA certificate and Certificate database and certificate database log. Select the C:\CABackupDatabase folder created in Step 1. Click Next.
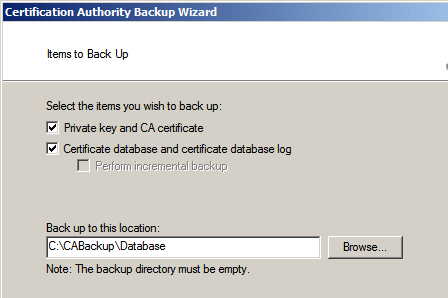
-
Enter a password to secure the private key and CA certificate. Click Next.
-
Verify that the certificate and database files were exported in the target directory.
-
Export the **HKLMSYSTEMCurrentControlSetServicesCertSvcConfiguration
** key to the *C:\\CABackupConfig* directory created in Step 1.

-
Copy the C:\CABackup directory to the Windows 2012 server.
-
I maintained the same servernames for my CA’s when I migrated so we’ll do the same here. Rename the Windows 2012 CA server to the same computer name as the 2008 root CA. As these are both offline and not joined to a domain, there shouldn’t be any naming collision in AD. If there is a static A record in DNS, that will need to be updated if the IP address is different.
-
Add the **Active Directory Certificate Services **role to the Windows 2012 server.
-
After restarting, finish the configuration of the ADCS.
-
Select Certificate Authority, then Next.

-
Accept the default option for Standalone CA as the server is not domain joined and click
-
Select Root CA as the CA Type and click Next.
-
At the Specify the type of the private key screen, select Use existing private key and the option Select a certificate and use its associated private key. Click Next.
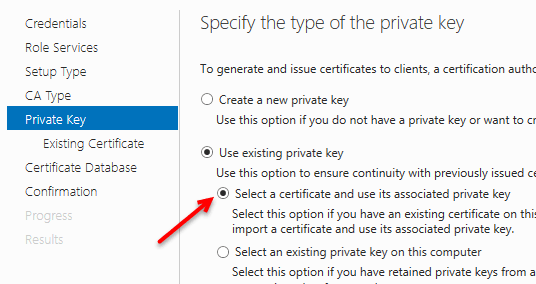
-
Click the Import **button and browse to the pfx certificate backed up from the Windows 2008 root CA. Enter the password then click It will take a few seconds for the certificate to appear, when it does, select the certificate name and click **Next.
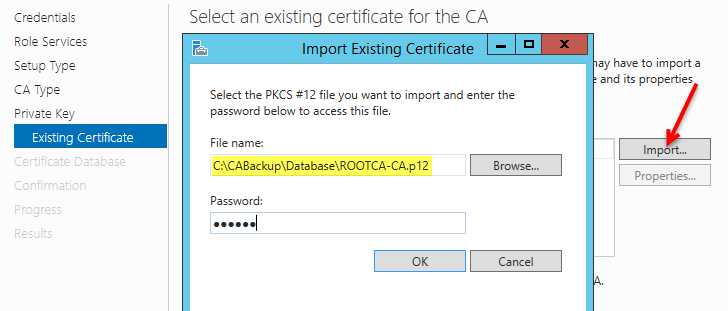
-
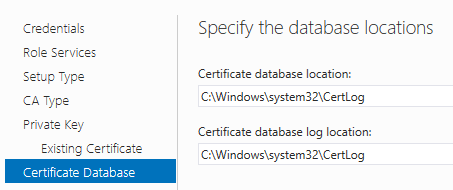
Accept the defaults for the database and log locations or specify a different location. Click Next.
-
Verify the settings in the Confirmation page and click the Configure
-
When the process completes, launch the **Certification Authority **mmc and verify the CA is visible and started.
-
Right click on the name of the CA and select All Tasks/Restore CA.
-
Click OK to stop the services.
-
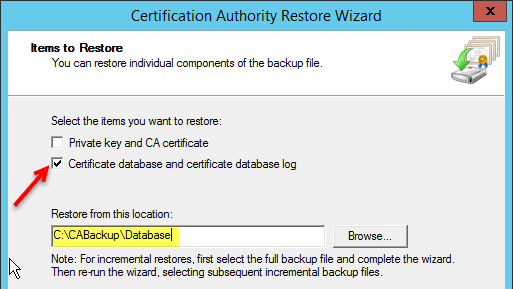
When the wizard launches, select the checkbox next to Certificate database and certificate database log. Browse to the location of the database files backed up from the Windows 2008 Root CA. Click Next.
-
Click Finish to start the process.
-
Select Yes to start the services when prompted.
-
On the Windows 2012 root CA, export the same registry key from Step 7.
-
Go the C:\CABackupConfig folder on the Windows 2012 root CA server, right click on the .reg file and select Merge.
-
In the Certification Authority mmc, right click the server name and stop, then start the services one more time.
-
This will create a new CRL which can be copied to the CRL Distribution Points.
-
If any scripts were previously copied over, they may be restored now.